Android Open Source illusion Project, also known as AOSiP, found its way to the Nexus 5 thanks to XDA Senior Member Xaif. If you are looking for an AOSP Oreo ROM, you should definitely give this project a try. At first, the developer said the Notification LED and Charging LED, Bluetooth, Reduce minimum panel brightness were not working, but early this morning they were able to get brightness & led.
Features of AOSiP ROM:
-Based on AOSP.
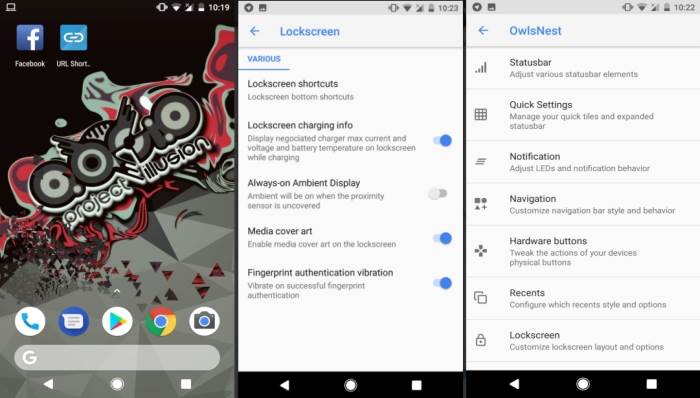
-Adjust statusbar element.
-Manage your qs tiles and expanded statusbar.
-Change notification color.
-Tweak the action of your device physical button.
-Config the recent style and option.
-Lockscreen customization.
-Gesture option.
-And much more.
Screenshot
Table of Contents

Changelog
08-Dec-2017
Merged Android 8.0.0_r35.
Security Patch December
03-Dec-2017
Enabled Notification LED and Charging LED.
Some users had some bluetooth issues. Fixed and probably its working now.
Reduce minimum panel brightness.
Fix kernel panic
Bugs Fixes
Like this AOSIP ROM based on the latest Android 8.0? We love it too and we know you are looking forward to install it on your phone now.
Before starting on the AOSiP custom ROMs for Nexus 5, I have to warn you that this is no child’s play. You need to have perfect knowledge of your device and how to flash custom ROMs on it before you even consider playing with your device.
How to install Android 8.0 Oreo AOSiP ROM on Nexus 5
- Download Android 8.1 Oreo AOSiP custom ROM for Nexus 5 and Google Apps 8.1 Nougat for Nexus 5 (hammerhead).
- Now reboot into TWRP. To boot into TWRP, first turn off your device and Then press Power and Volume Down until you enter Fastboot Mode. From here you use the volume buttons to scroll up and down and use the Power button to confirm. Highlight Recovery Mode and press Power to enter custom recovery.
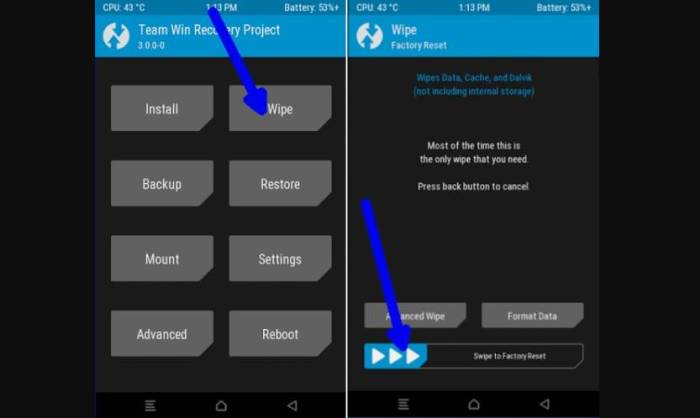
- Once the phone enters into TWRP Recovery, perform a full data wipe task by Select “Wipe” from the main menu of the TWRP recovery and then select “Swipe to factory reset” option on the bottom of the screen.

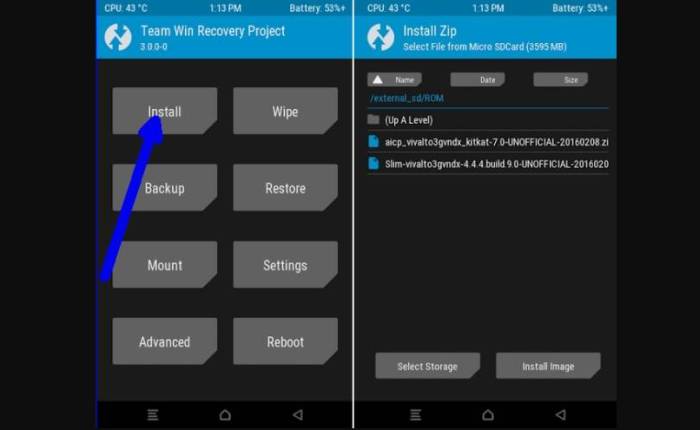
- Return to the main TWRP menu and choose Install. Browse and select the
AOSiP-7.0-Derp-hammerhead-20171208.zip file which you copied earlier to your phone’s SD card in the second step. Swipe to Install/Flash in order to begin the flashing process.

- Now return to home in the TWRP and tap on the install option. Navigate to the open_gapps-arm-8.1-pico-20180516.zip file and select it.
- Once both the Gapps and ROM are installed, and then select “Reboot System” button.
Your phone will now reboot. That’s it! You have successfully installed AOSIP Oreo on your Nexus 5. If the reboot takes a bit long time, you do not need to worry because this is normal.
