How To Root Acer Z320 / Z220 – Root or Rooting a device, simply means that you are now able to take full control of your Android device. After rooting, the smartphone has the ability to customize beyond limits. So, there are quite a few benefits of rooting the Acer Z320.
After getting Administrative privileges over the phone, you can enjoy third-party apps to enhance the flexibility and customizability of your device. Here we’ve a detailed guide on how to root Android 5.1 Lollipop on Acer Z320 by installing the latest KingRoot app . This Kingroot method has been tested by many users on their Acer Z320 anda Z220 devices running the official Android 5.1 Lollipop firmware.
Before we start, a word of caution though: while rooting is not as dangerous as some people make it sound, there are some inherent risks that should be kept in mind. While it won’t be a problem on the Acer Z320 itself, your phones will have their warranties void if you root them.
How To Root Acer Z320 / Z220 With Kingroot
- Enable installation from unknown sources on your device. Simply go to to Settings > Security >> then enable Unknown Sources.
- Download KingRoot app into your phone then install it.
- Once installed, launch KingRoot app up
- KingRoot will then verify your phone. It won’t take long.
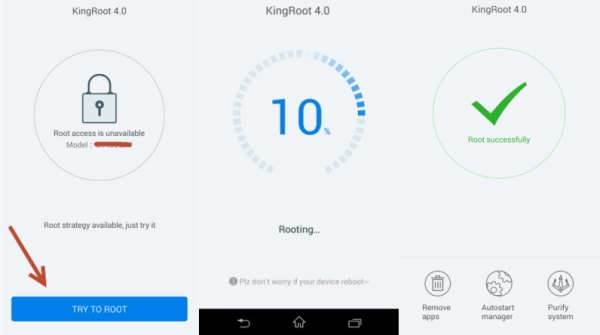
- Once the app has been successful verifying your phone, you’ll see either Start Root or Try To Root button. Just tap on it.

- Just sit tight and wait for the app to do its job. Once rooting is complete, you should see “Success!” on your screen and the KingRoot icon in the Launcher menu.
Done! You’ve successfully rooted Acer Z320 / Z220 on the Android 5.1.1 Lollipop official build. Let us know in the comments area below if you are facing any problem or having question while rooting your Z320 or Z220 on Android 5.1.1.

